-
[SwiftUI] 8. Interfacing with UIKit [마지막]iOS Dev/SwiftUI 2023. 5. 11. 01:41반응형
SwiftUI로 이루어진 뷰에 UIKit 요소를 적용시킬 수 있을까?
이번 튜토리얼에서는 UIKit 요소를 어떻게 활용할 수 있는지를 알아본다.
Section 1. Create a View to Represent a UIPageViewController
UIView 요소를 사용하고 싶다면 UIViewRepresentable을, UIViewController 요소를 사용하고 싶다면 UIViewControllerRepresentable 프로토콜을 채택해야 한다.
Views 그룹에 PageView 라는 이름의 그룹을 만들고, 그 안에 PageViewController.swift 파일을 만든다.

다음과 같은 내용으로 채워준다.
import SwiftUI
import UIKit

struct PageViewController<Page: View>: UIViewControllerRepresentable {

    var pages: [Page]

    func makeUIViewController(context: Context) -> UIPageViewController {
        let pageViewController = UIPageViewController(
            transitionStyle: .scroll,
            navigationOrientation: .horizontal
        )

        return pageViewController
    }

    func updateUIViewController(_ pageViewController: UIPageViewController, context: Context) {
        pageViewController.setViewControllers([UIHostingController(rootView: pages[0])], direction: .forward, animated: true)
    }
}
먼저, UIViewControllerRepresentable은 ViewController를 SwiftUI의 뷰 요소에 집어넣기 위해 채택해야 하는 프로토콜이다. 당연하게도 struct에 채택해야 하며, makeUIViewController와 updateUIViewController 메소드를 필수 구현해야 한다.
까보면 associatedtype으로 UIViewControllerType을 지정해주어야 하는데, 예제에서는 이 타입을 makeUIViewController 메소드 또는 updateUIViewController 메소드를 통해 UIPageViewController으로 정의하고 있다.makeUIViewController는 가장 초기에 ViewController 객체를 만들고 구성하는 단계이다. 시스템은 이 메소드를 뷰 컨트롤러를 만들 때 딱 한번만 호출한다. 그 다음부터 뷰에 영향을 주는 작업에 대해 시스템은 모조리 updateUIViewController를 호출한다.
또한, 이 메소드는 @MainActor으로 구성되어있다. 이는 UI 관련 작업이기 때문에 Main Actor 쓰레드에서 돌아야한다는 것을 명시한다.다음은 updateUIViewController이다. 이 친구는 특정 ViewController의 상태 변화에 대응하는 메소드이다. 새로운 정보를 context로 받아서 업데이트 해주면 된다.
다음은 UIHostingController이다. 간단하게 말하자면 SwiftUI 뷰 요소를 띄울 수 있는 ViewController이다. 여기서는 ViewController가 pages[0]이라는 SwiftUI View를 띄운다.
다음으로 진행하기 전에 Asset에 feature card들을 추가해주어야 한다. 다음 파일 압축을 해제하여 등록하자.
보면 이미 에셋에 등록되어 있는 친구들이지만 dimension이 다르다. Landmark.swift 파일로 이동하여 다음 내용을 추가한다.
import Foundation
import SwiftUI
import CoreLocation

struct Landmark: Hashable, Codable, Identifiable {
    var id: Int
    var name: String
    var park: String
    var state: String
    var description: String
    var isFavorite: Bool
    var isFeatured: Bool

    var category: Category
    enum Category: String, CaseIterable, Codable {
        case lakes = "Lakes"
        case rivers = "Rivers"
        case mountains = "Mountains"
    }

    private var imageName: String
    var image: Image {
        return Image(imageName)
    }
    var featureImage: Image? { // ✅
        isFeatured ? Image(imageName + "_feature") : nil
    }

    private var coordinates: Coordinates
    var locationCoordinate: CLLocationCoordinate2D {
        CLLocationCoordinate2D(latitude: coordinates.latitude, longitude: coordinates.longitude)
    }

    struct Coordinates: Hashable, Codable {
        var latitude: Double
        var longitude: Double
    }
}
다음, PageView 그룹에 FeatureCard.swift 파일을 추가한다.

다음 내용을 추가한다.
import SwiftUI

struct FeatureCard: View {
    var landmark: Landmark

    var body: some View {
        landmark.featureImage?
            .resizable()
            .aspectRatio(3 / 2, contentMode: .fit)
    }
}

struct FeatureCard_Previews: PreviewProvider {
    static var previews: some View {
        FeatureCard(landmark: ModelData().features[0])
    }
}
이렇게 해놓고 preview를 해보니 안되서 뭐가 문제인가 봤더니 [0]번 사진 이름을 mosu로 바꿔놓아서 그렇다. 그럼 새로 받은 파일 이름도 바꿔야겠지?


문제 해결. 이제 코드를 마저 채워보자.
import SwiftUI

struct FeatureCard: View {
    var landmark: Landmark

    var body: some View {
        landmark.featureImage?
            .resizable()
            .aspectRatio(3 / 2, contentMode: .fit)
            .overlay {
                TextOverlay(landmark: landmark)
            }
    }
}

struct TextOverlay: View {
    var landmark: Landmark

    var gradient: LinearGradient {
        .linearGradient(
            Gradient(colors: [.black.opacity(0.6), .black.opacity(0)]),
            startPoint: .bottom,
            endPoint: .center
        )
    }

    var body: some View {
        ZStack(alignment: .bottomLeading) {
            gradient
            VStack(alignment: .leading) {
                Text(landmark.name)
                    .font(.title)
                    .bold()
                Text(landmark.park)
            }
            .padding()
        }
        .foregroundColor(.white)
    }
}

struct FeatureCard_Previews: PreviewProvider {
    static var previews: some View {
        FeatureCard(landmark: ModelData().features[0])
    }
}
한 가지 이상한 점이 눈에 띄었다. ZStack 부분의 gradient이다.
gradient를 주석처리 하고 결과를 한번 보자.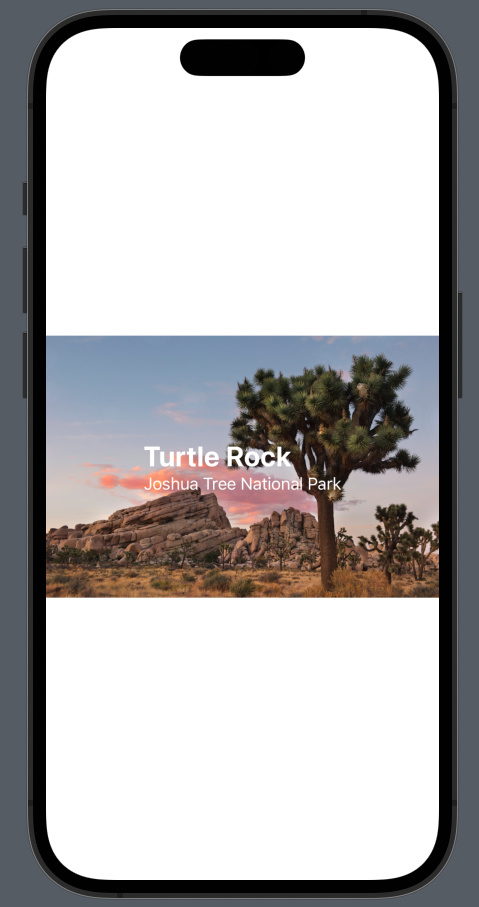
Text가 중앙으로 올라왔다. 분명 alignment는 bottomLeading이고, overLay도 이미지에서 적용했는데 왜 중앙으로 올까?
먼저 알아야 할 것은 SwiftUI가 뷰를 배치할 때 부모는 자식의 크기와 위치를 제안하고, 자식은 해당 제안을 고려해서 크기와 위치를 결정해서 알려준다. 부모는 그 결정을 보고 뷰에 적절히 배치한다.
이제 LinearGradient 코드를 까보자. The gradient maps the unit space points into the bounding rectangle of each shape filled with the gradient. 라고 적혀있다. 아하! 결국 꽉 찬 rectangle을 만들어놓는거랑 똑같은 것이다.
Rectangle에 frame 등을 지정하지 않는다면 layout neutral, 즉 레이아웃 중립 상태이기 때문에, 부모 뷰인 imageView와 동일한 사이즈를 갖게 된다. 따라서 text를 포함한 VStack을 놓을 때 전체 imageView 영역에서 판단하게 된다. 순서가 바뀌어도 레아이웃은 동일하게 적용된다. (어차피 다 같은 ZStack의 자식들이니.)
gradient를 뺀 상황에서는 Text를 포함한 VStack이 Text가 필요한 사이즈 만큼만 갖기 때문에 중앙에 놓이게 된다.가설을 증명하기 위해 gradient를 잠시 지워두고 clear한 Rectangle() 하나를 둬봤다.
    var body: some View {
        ZStack(alignment: .bottomLeading) {
//            gradient
            Rectangle()
                .fill(.clear)
            VStack(alignment: .leading) {
                Text(landmark.name)
                    .font(.title)
                    .bold()
                Text(landmark.park)
            }
            .padding()
        }
        .foregroundColor(.white)
    }
순서를 바꾸면?
    var body: some View {
        ZStack(alignment: .bottomLeading) {
//            gradient
            VStack(alignment: .leading) {
                Text(landmark.name)
                    .font(.title)
                    .bold()
                Text(landmark.park)
            }
            .padding()
            Rectangle()
                .fill(.clear)
        }
        .foregroundColor(.white)
    }
역시나 똑같다. 증명 완료.
다음 PageView 그룹에 PageView.swift 파일을 만들자.

다음 내용으로 채우자.
import SwiftUI

struct PageView<Page: View>: View {
    var pages: [Page]

    var body: some View {
        PageViewController(pages: pages)
    }
}

struct PageView_Previews: PreviewProvider {
    static var previews: some View {
        PageView(pages: ModelData().features.map {
            FeatureCard(landmark: $0)
        })
        .aspectRatio(3 / 2, contentMode: .fit)
    }
}
Section 2. Create the View Controller's Data Source
PageViewController.swift 에 다음 내용을 추가한다.
import SwiftUI
import UIKit

struct PageViewController<Page: View>: UIViewControllerRepresentable {

    var pages: [Page]

    func makeCoordinator() -> Coordinator {
        Coordinator(self)
    }

    func makeUIViewController(context: Context) -> UIPageViewController {
        let pageViewController = UIPageViewController(
            transitionStyle: .scroll,
            navigationOrientation: .horizontal
        )

        return pageViewController
    }

    func updateUIViewController(_ pageViewController: UIPageViewController, context: Context) {
        pageViewController.setViewControllers([UIHostingController(rootView: pages[0])], direction: .forward, animated: true)
    }

    class Coordinator: NSObject {
        var parent: PageViewController

        init(_ pageViewController: PageViewController) {
            parent = pageViewController
        }
    }
}
Coordinator 요소가 추가되었다. UIViewControllerRepresentable에서 Coordinator를 추가로 구현한다는 것은, 다른 SwiftUI 요소와 상호작용할 일이 생길 때만 넣어주면 된다. 이 예제에서는 화면 간 전환이 이루어지기 때문에 추가한 것으로 보인다.
추가로, makeCoordinator() 메소드는 앞서 언급한 makeUIViewController() 메소드가 호출되기 전에 시스템에서 호출한다.이제 마저 코드를 채워 넣는다.
import SwiftUI
import UIKit

struct PageViewController<Page: View>: UIViewControllerRepresentable {

    var pages: [Page]

    func makeCoordinator() -> Coordinator {
        Coordinator(self)
    }

    func makeUIViewController(context: Context) -> UIPageViewController {
        let pageViewController = UIPageViewController(
            transitionStyle: .scroll,
            navigationOrientation: .horizontal
        )
        pageViewController.dataSource = context.coordinator
        return pageViewController
    }

    func updateUIViewController(_ pageViewController: UIPageViewController, context: Context) {
        pageViewController.setViewControllers([context.coordinator.controllers[0]], direction: .forward, animated: true)
    }

    class Coordinator: NSObject, UIPageViewControllerDataSource {
        var parent: PageViewController
        var controllers = [UIViewController]()

        init(_ pageViewController: PageViewController) {
            parent = pageViewController
            controllers = parent.pages.map { UIHostingController(rootView: $0) }
        }

        func pageViewController(_ pageViewController: UIPageViewController, viewControllerBefore viewController: UIViewController) -> UIViewController? {
            guard let index = controllers.firstIndex(of: viewController) else {
                return nil
            }

            if index == 0 {
                return controllers.last
            }
            return controllers[index - 1]
        }

        func pageViewController(_ pageViewController: UIPageViewController, viewControllerAfter viewController: UIViewController) -> UIViewController? {
            guard let index = controllers.firstIndex(of: viewController) else {
                return nil
            }

            if index + 1 == controllers.count {
                return controllers.first
            }
            return controllers[index + 1]
        }
    }
}
다시 PageView.swift로 와서 preview를 보자. 스크롤이 잘 되는 것을 확인할 수 있다.
Section 3. Track the Page in a SwiftUI View's State
UIPageControl 을 써보기 전에 먼저 state의 binding을 ViewController에 어떻게 시키는지 알아본다.
PageViewController.swift로 가서 다음을 수정한다.
import SwiftUI
import UIKit

struct PageViewController<Page: View>: UIViewControllerRepresentable {

    var pages: [Page]
    @Binding var currentPage: Int // ✅

    func makeCoordinator() -> Coordinator {
        Coordinator(self)
    }

    func makeUIViewController(context: Context) -> UIPageViewController {
        let pageViewController = UIPageViewController(
            transitionStyle: .scroll,
            navigationOrientation: .horizontal
        )
        pageViewController.dataSource = context.coordinator
        return pageViewController
    }

    func updateUIViewController(_ pageViewController: UIPageViewController, context: Context) {
        pageViewController.setViewControllers([context.coordinator.controllers[currentPage]], direction: .forward, animated: true) // ✅
    }

    class Coordinator: NSObject, UIPageViewControllerDataSource {
        var parent: PageViewController
        var controllers = [UIViewController]()

        init(_ pageViewController: PageViewController) {
            parent = pageViewController
            controllers = parent.pages.map { UIHostingController(rootView: $0) }
        }

        func pageViewController(_ pageViewController: UIPageViewController, viewControllerBefore viewController: UIViewController) -> UIViewController? {
            guard let index = controllers.firstIndex(of: viewController) else {
                return nil
            }

            if index == 0 {
                return controllers.last
            }
            return controllers[index - 1]
        }

        func pageViewController(_ pageViewController: UIPageViewController, viewControllerAfter viewController: UIViewController) -> UIViewController? {
            guard let index = controllers.firstIndex(of: viewController) else {
                return nil
            }

            if index + 1 == controllers.count {
                return controllers.first
            }
            return controllers[index + 1]
        }
    }
}
상위 뷰인 PageView.swift 파일로 가서 state를 추가해준다. 뷰도 살짝 추가해준다.
import SwiftUI

struct PageView<Page: View>: View {
    var pages: [Page]
    @State private var currentPage = 0

    var body: some View {
        VStack {
            PageViewController(pages: pages, currentPage: $currentPage)
            Text("Current Page: \(currentPage)")
        }

    }
}

struct PageView_Previews: PreviewProvider {
    static var previews: some View {
        PageView(pages: ModelData().features.map {
            FeatureCard(landmark: $0)
        })
        .aspectRatio(3 / 2, contentMode: .fit)
    }
}
다시 PageViewController.swift로 가서 Delegate를 추가 적용시켜준다.
import SwiftUI
import UIKit

struct PageViewController<Page: View>: UIViewControllerRepresentable {

    var pages: [Page]
    @Binding var currentPage: Int

    func makeCoordinator() -> Coordinator {
        Coordinator(self)
    }

    func makeUIViewController(context: Context) -> UIPageViewController {
        let pageViewController = UIPageViewController(
            transitionStyle: .scroll,
            navigationOrientation: .horizontal
        )
        pageViewController.dataSource = context.coordinator
        pageViewController.delegate = context.coordinator // ✅
        return pageViewController
    }

    func updateUIViewController(_ pageViewController: UIPageViewController, context: Context) {
        pageViewController.setViewControllers([context.coordinator.controllers[currentPage]], direction: .forward, animated: true)
    }

    class Coordinator: NSObject, UIPageViewControllerDataSource, UIPageViewControllerDelegate {
        var parent: PageViewController
        var controllers = [UIViewController]()

        init(_ pageViewController: PageViewController) {
            parent = pageViewController
            controllers = parent.pages.map { UIHostingController(rootView: $0) }
        }

        func pageViewController(_ pageViewController: UIPageViewController, viewControllerBefore viewController: UIViewController) -> UIViewController? {
            guard let index = controllers.firstIndex(of: viewController) else {
                return nil
            }

            if index == 0 {
                return controllers.last
            }
            return controllers[index - 1]
        }

        func pageViewController(_ pageViewController: UIPageViewController, viewControllerAfter viewController: UIViewController) -> UIViewController? {
            guard let index = controllers.firstIndex(of: viewController) else {
                return nil
            }

            if index + 1 == controllers.count {
                return controllers.first
            }
            return controllers[index + 1]
        }

        func pageViewController(_ pageViewController: UIPageViewController, didFinishAnimating finished: Bool, previousViewControllers: [UIViewController], transitionCompleted completed: Bool) { // ✅
            if completed,
               let visibleViewController = pageViewController.viewControllers?.first,
               let index = controllers.firstIndex(of: visibleViewController) {
                parent.currentPage = index
            }
        }
    }
}
Section 4. Add a Custom Page Control
UIPageControl을 적용해보자.
PageView 그룹에 PageControl.swift 파일을 만들자.

다음과 같이 내용을 채운다.
import SwiftUI
import UIKit

struct PageControl: UIViewRepresentable {
    var numberOfPages: Int
    @Binding var currentPage: Int

    func makeUIView(context: Context) -> UIPageControl {
        let control = UIPageControl()
        control.numberOfPages = numberOfPages

        return control
    }

    func updateUIView(_ uiView: UIPageControl, context: Context) {
        uiView.currentPage = currentPage
    }
}
다시 PageView.swift로 가서 다음을 수정한다.
import SwiftUI

struct PageView<Page: View>: View {
    var pages: [Page]
    @State private var currentPage = 0

    var body: some View {
        ZStack(alignment: .bottomTrailing) {
            PageViewController(pages: pages, currentPage: $currentPage)
            PageControl(numberOfPages: pages.count, currentPage: $currentPage)
                .frame(width: CGFloat(pages.count * 18))
                .padding(.trailing)
        }

    }
}

struct PageView_Previews: PreviewProvider {
    static var previews: some View {
        PageView(pages: ModelData().features.map {
            FeatureCard(landmark: $0)
        })
        .aspectRatio(3 / 2, contentMode: .fit)
    }
}
이제 PageControl.swift 파일로 돌아가서 coordinator 작업을 진행한다.
import SwiftUI
import UIKit

struct PageControl: UIViewRepresentable {
    var numberOfPages: Int
    @Binding var currentPage: Int

    func makeCoordinator() -> Coordinator {
        Coordinator(self)
    }

    func makeUIView(context: Context) -> UIPageControl {
        let control = UIPageControl()
        control.numberOfPages = numberOfPages
        control.addTarget(context.coordinator, action: #selector(Coordinator.updateCurrentPage(sender:)), for: .valueChanged)
        return control
    }

    func updateUIView(_ uiView: UIPageControl, context: Context) {
        uiView.currentPage = currentPage
    }

    class Coordinator: NSObject {
        var control: PageControl

        init(_ control: PageControl) {
            self.control = control
        }

        @objc
        func updateCurrentPage(sender: UIPageControl) {
            control.currentPage = sender.currentPage
        }
    }
}
objc 메소드도 등장한다!
지금까지 한 내용을 CategoryHome.swift에 등록하자.
import SwiftUI

struct CategoryHome: View {
    @EnvironmentObject var modelData: ModelData
    @State private var showingProfile = false

    var body: some View {
        NavigationStack {
            List {
                PageView(pages: modelData.features.map { FeatureCard(landmark: $0) }) // ✅
                    .aspectRatio(3 / 2, contentMode: .fit)
                    .listRowInsets(EdgeInsets())
                ForEach(modelData.categories.keys.sorted(), id: \.self) { key in
                    CategoryRow(categoryName: key, items: modelData.categories[key] ?? [])
                }
                .listRowInsets(EdgeInsets())
            }
            .listStyle(.inset)
            .navigationTitle("Featured")
            .toolbar {
                Button {
                    showingProfile.toggle()
                } label: {
                    Label("User Profile", systemImage: "person.crop.circle")
                }
            }
            .sheet(isPresented: $showingProfile) {
                ProfileHost()
                    .environmentObject(modelData)
            }
        }
    }
}

struct CategoryHome_Previews: PreviewProvider {
    static var previews: some View {
        CategoryHome()
            .environmentObject(ModelData())
    }
}
끝!!
Check Your Understanding


답은 3 3
반응형'iOS Dev > SwiftUI' 카테고리의 다른 글
[Tuist][TCA] EXC_BAD_ACCESS 에러가 뜰 때 (1) 2023.10.02 [SwiftUI] Square Shape를 활용하여 Image 조정하기 (1) 2023.07.03 [SwiftUI] 7. Working with UI Controls (0) 2023.05.06 [SwiftUI] 6. Composing Complex Interfaces (0) 2023.05.04 [SwiftUI] 5. Animating Views and Transitions (0) 2023.05.04
